
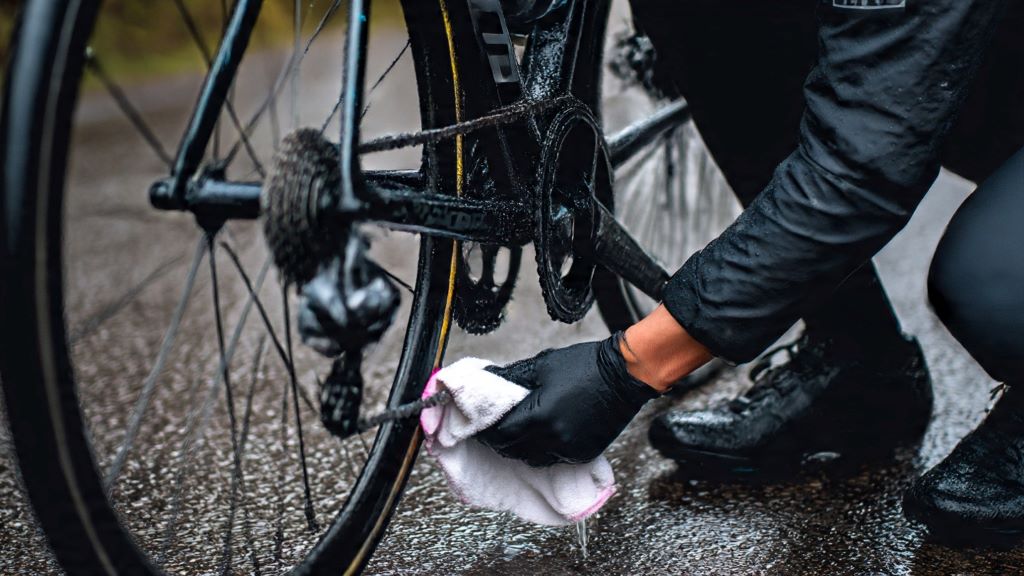
Nothing ruins a peaceful ride quite like a persistent creak from your bike. Many cyclists notice this annoying sound appearing after riding in wet conditions. Rain introduces moisture into various bike components, causing them to expand, contract, or lose lubrication. This article explores why your bike creaks after rain and how to silence those frustrating noises.
At Cyclist View, we understand how important a smooth, quiet ride is to your cycling experience. Whether you’re a weekend warrior or a daily commuter, addressing creaking sounds promptly prevents minor issues from becoming expensive repairs.
Understanding Why Rain Causes Bike Creaking
Rain affects your bike in several ways. Water seeps into joints, bearings, and connections between components. When moisture penetrates these areas, it washes away protective lubricants and creates friction between metal surfaces. Additionally, temperature changes associated with wet weather cause materials to expand and contract at different rates.
The most common culprit behind post-rain creaking is the bottom bracket. This critical component connects your crankset to the bike frame and endures tremendous force with every pedal stroke. When water infiltrates the bottom bracket area, it compromises the interface between the bracket and the frame. If you’re experiencing this issue, learning how to fix creaking bottom bracket problems becomes essential for restoring your bike’s performance.
However, bottom brackets aren’t the only source of creaking. Headsets, seat posts, pedals, and chainring bolts also produce similar sounds when exposed to moisture. Identifying the exact source requires systematic investigation.
Common Sources of Post-Rain Creaking
Bottom Bracket Issues
The bottom bracket bears the brunt of your pedaling power. Press-fit bottom brackets are particularly susceptible to creaking after rain because they rely on tight tolerances between the bracket and frame. Water intrusion disrupts this relationship, creating annoying sounds with each pedal rotation.
Threaded bottom brackets can also develop creaks when water reaches the threads. Corrosion forms quickly on wet metal surfaces, causing the bracket to loosen slightly within the frame.
Headset Problems
Your bike’s headset allows smooth steering while supporting the fork and handlebars. Rain often drips down the head tube, reaching the headset bearings. When moisture mixes with dirt and old grease, it creates a grinding paste that produces creaking sounds during turns or when riding over bumps.
Seat Post Creaking
The connection between your seat post and frame represents another moisture-prone area. Water runs down the seat tube during rainy rides, especially if you don’t use a proper seat post collar. This creates friction between the post and frame, resulting in rhythmic creaking that matches your pedaling cadence.
Pedal and Cleat Noises
Pedals thread into crank arms with significant torque. Rain can loosen these connections or wash away the grease protecting the threads. Similarly, cleats attached to cycling shoes absorb moisture, causing them to creak against pedal mechanisms.
Diagnosing the Source of Your Creak
Finding the exact source of creaking requires patience and methodical testing. Start by cleaning your entire bike thoroughly. Dirt often masks the true source of noises.
Next, perform the bounce test. Lift your bike slightly and drop it on the ground. Listen carefully to identify which area produces sound. This test helps distinguish between bottom bracket creaks and other sources.
Try the stationary pedal test. While standing next to your bike, hold the handlebars firmly and press down hard on one pedal. Alternate between pedals while listening for creaks. Bottom bracket problems typically produce sound during this test.
According to bicycle maintenance experts at Park Tool, systematic diagnosis saves time and prevents unnecessary component replacement. Their comprehensive guides help cyclists identify and resolve various mechanical issues.

Immediate Post-Rain Maintenance Steps
After riding in rain, take several preventive actions. First, wipe down your entire bike with a clean, dry cloth. Pay special attention to areas where water accumulates, such as the bottom bracket shell, headset, and seat tube.
Next, inspect your chain. Rain strips away chain lubricant rapidly. Apply appropriate chain lube after the chain dries completely. Wet conditions require wet lube, which resists water better than dry formulations.
Check all bolts and connections. Rain can loosen various components over time. Use a torque wrench to verify that critical bolts maintain proper tension. This simple step prevents many creaking issues from developing.
Long-Term Solutions for Post-Rain Creaking
Bottom Bracket Maintenance
If your bottom bracket creaks consistently after rain, removal and reinstallation often solves the problem. Clean the bottom bracket shell thoroughly and remove any corrosion. Apply appropriate grease or friction paste depending on your bottom bracket type.
Press-fit bottom brackets benefit from specialized friction compounds that prevent creaking. Threaded brackets require quality grease on the threads. Proper installation torque is critical for both types.
Protecting Key Components
Prevention beats cure when dealing with rain-related creaking. Apply frame protection products to vulnerable areas. These treatments create water-resistant barriers that prevent moisture intrusion.
Consider installing fenders if you frequently ride in wet conditions. Fenders dramatically reduce the amount of water reaching your bike’s components. They also prevent road grime from mixing with water and creating abrasive paste.
Regular Cleaning and Lubrication
Establish a maintenance schedule based on your riding conditions. Bikes exposed to frequent rain require more attention than fair-weather machines. Clean and lubricate your bike after every wet ride.
Focus on pivot points, bearings, and threaded connections. These areas deteriorate quickly without proper care. Use appropriate lubricants for each application; grease for bearings, light oil for pivots, and specialized chain lube for drivetrain components.
When to Seek Professional Help
Some creaking problems require professional intervention. If you’ve cleaned, lubricated, and inspected your bike without success, visit a qualified bike mechanic. They possess specialized tools and knowledge for diagnosing stubborn issues.
Bottom bracket removal requires specific tools. Press-fit brackets demand precision during installation. Attempting these tasks without proper equipment risks damaging your frame. Professional mechanics complete these jobs efficiently and correctly.
Additionally, persistent creaking sometimes indicates worn components. Bearings eventually wear out, regardless of maintenance quality. Mechanics can assess component condition and recommend replacements when necessary.
Preventing Future Rain-Related Creaking
Smart riding habits minimize rain damage. Avoid deep puddles when possible, as they submerge critical components in contaminated water. Choose routes with better drainage during wet weather.
Invest in quality bike covers for storage. Even if you clean your bike after riding, moisture can accumulate overnight. Covers protect against condensation and prevent rust formation.
Consider applying protective coatings to vulnerable frame areas. Products like helicopter tape or frame protection film shield your bike from water intrusion. These investments pay dividends through reduced maintenance and extended component life.
Conclusion
Bike creaking after riding in rain frustrates cyclists but usually indicates manageable problems. Bottom brackets, headsets, seat posts, and pedals commonly develop creaks when exposed to moisture. Systematic diagnosis identifies the source, while proper cleaning and lubrication restore quiet operation.
Immediate post-rain maintenance prevents many creaking issues from developing. Regular inspection and timely intervention keep your bike running smoothly. When problems persist despite your efforts, professional mechanics provide expertise and specialized tools for complex repairs.
Therefore, don’t ignore creaking sounds. They signal maintenance needs that worsen when neglected. Address them promptly, and your bike will reward you with years of reliable, quiet service.
Frequently Asked Questions
Why does my bike only creak after riding in the rain?
Rain washes away protective lubricants and introduces moisture into component interfaces. This creates friction between metal surfaces that were previously separated by grease or oil. The moisture also causes slight expansion of materials, changing fit tolerances.
Can I ride my bike while it’s creaking, or will it cause damage?
You can ride safely with most creaks, but they indicate maintenance needs. Ignoring creaking allows problems to worsen, potentially leading to component failure or frame damage. Address creaks promptly to prevent expensive repairs.
How often should I service my bottom bracket if I ride in rain frequently?
Cyclists who ride regularly in wet conditions should inspect and service their bottom bracket every three to six months. More frequent service may be necessary for daily rain riders or those in extremely wet climates.
What’s the difference between a creak and a click on my bike?
Creaks typically indicate friction between improperly lubricated surfaces and occur rhythmically with pedaling or movement. Clicks often suggest loose components, worn parts, or debris in the drivetrain and may occur irregularly.
Will using more lubricant stop the creaking?
Excess lubricant attracts dirt and rarely solves creaking problems. Instead, clean affected areas thoroughly, apply appropriate amounts of the correct lubricant type, and ensure proper torque on all connections for best results.
Related Topics:
Get the Most Out of Your Bike Rides: Essential Bike Repair Skills
The Evolution of BMX: Lightweight Bikes for Modern Riders


