You’ve decided to try paddleboarding, and now you’re staring at a wall of prices that range from “surprisingly cheap” to “new car down payment.” The truth is, you don’t need to spend a fortune to get a safe, stable, and genuinely fun board. With inflatable paddleboards (iSUPs) dominating the market, beginners have more affordable options than ever. But not all budget boards are created equal—and picking the wrong one can make your first season frustrating instead of fun. This guide breaks down what actually matters when choosing an affordable inflatable board, what you can safely compromise on, and how to spot a solid value that won’t leave you stranded mid-lake.
Key Takeaways
- A great beginner iSUP balances stability, weight capacity, and durability—focus on these three things above flashy freebies.
- All-around shapes are the most forgiving and versatile choices for new paddlers tackling flat water.
- Budget boards typically run 6 to 8 inches thick; prioritize 6-inch minimum thickness with a drop-stitch core for rigidity.
- Even a recreational inflatable board should have a 2-year warranty and reliable customer support, especially from authorized third-party retailers.
- You do not need to pay premium prices for premium fun; name-brand accessories and bundled kits often outperform no-name super-deals.
Why Choose an Inflatable as a First Board?
Inflatable paddleboards have become the default choice for beginners, and for good reason. Unlike hard boards, they’re portable enough to fit in a car trunk, store in a closet, and carry on an airplane. They’re also far more forgiving if you accidentally hit a rock or drag it across a gravel launch. For a first-time buyer, the lower risk of dinging a hard epoxy board is a huge relief. Plus, they tend to be less expensive than their rigid counterparts while still delivering a stable, enjoyable ride for recreational paddling.
That said, “inflatable” doesn’t automatically mean “good.” The quality of the material (military-grade PVC is the standard you want) and the method of construction matter significantly. The single most important thing to look for is the construction style. A woven drop-stitch core is a good feature because it allows the board to be inflated to high pressures—creating a board that feels nearly as rigid as a hard shell.
When you start searching for a best budget isup for beginners, you’ll likely see a variety of direct-to-consumer brands. While some are excellent, you should also consider reputable sources that validate the gear they sell, which reduces the guesswork involved in sorting through hundreds of online listings. A solid beginner board exists in the $300–$500 range, but only if it meets the specific standards we outline below.
What to Look For in a Budget iSUP
Before you hit “add to cart,” you need a checklist that separates essential features from marketing fluff. In an affordable board, materials and hardware are where corners get cut—so here is what demands your attention.
Board Dimensions and Stability
For novices, stability trumps speed. A wide board will support you better while you figure out your balance. Look for a width of at least 31 inches; a 32- or 34-inch width is even better. Combined with a length of 10 to 11 feet, this gives you plenty of surface area. You also need to check the thickness—typically 6 inches on most mid-range boards. Thicker boards (6 to 8 inches) offer more rigidity and support for heavier paddlers, reducing the “bounce” you might feel on cheaper, thinner boards.
Weight Capacity and Rider Size
Most budgets list a weight capacity of around 275 to 300 pounds. Here’s a practical rule: add your body weight, the weight of your clothing, and a cooler, plus about 25 pounds of gear. That total should be well under the board’s maximum. If you are a heavier paddler, you may need to look for “higher weight capacity” boards even in the budget category, as low-pressure rails can feel wobbly for bigger riders. Always err on the side of a higher capacity than you think you need.
Construction and Material Quality
A budget board is often a single-layer PVC board. This is acceptable for light river or lake use where you are unlikely to scrape against barnacles. However, you should verify that it is a “drop-stitch” construction. In this process, thousands of threads connect the top and bottom layers, allowing the board to maintain a high-pressure, stiff profile. If the listing doesn’t mention drop-stitch, move on. Double-layer PVC is heavier but more durable—however, a quality single-layer board is fine for flat-water beginners if handled with care.
Stability vs. Performance: What Does “Beginner” Actually Mean?
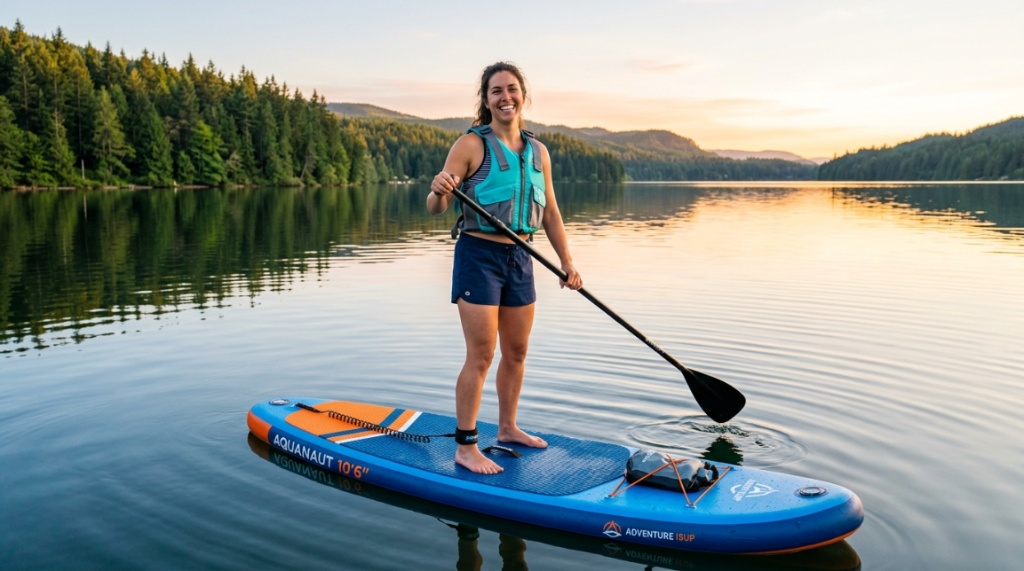
In the paddleboard world, “beginner” almost always equals “stable.” You are not looking for a touring board to cover long distances quickly, nor a racing board that feels like a log rolling on water. You want an all-around shape. An all-around board has a rounded nose and a wider tail, making it balanced when you move your feet to paddle forward or turn around.
Budget boards are best on flat water: calm lakes, slow-moving rivers, and protected bays. They are much less suited to ocean surf—you’ll find it difficult to punch through waves because the “rocker” (the upward curve of the nose) is relatively flat. This trade-off is fine for most beginners, who should avoid high wind and offshore currents anyway to stay safe. Try to think of budget boards as “mellow condition” boards. They are forgiving, but not invincible speed machines.
The Gear That Comes in the Box
Often, the actual value of an entry-level kit is in the accessories. The board itself might cost $250, but if you have to buy a paddle, pump, and leash separately, you could easily spend another $200. Here is what to expect from a reputable budget kit and how to spot the cheap versions.
Paddle Design Matters
Many budget paddles are aluminum shafts. These are heavy and can cause fatigue in your arms quickly. If you can find one with a fiberglass shaft or even a “plastic” reinforced blade without a telescoping joint, it’s often lighter. You also need an adjustable paddle to match your height (stand next to it, and raise the handle to your wrist height). If the bundle lacks this, factor in buying a replacement paddle.
Pump Quality
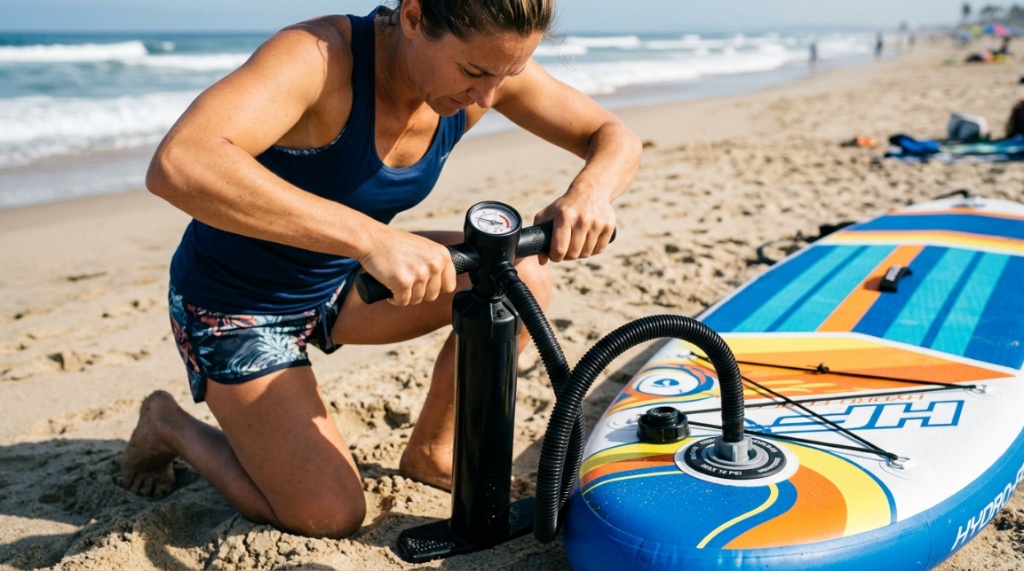
Bundles often throw in a basic pump that takes 30 minutes to fill a board because the cylinder is too small. A dual-chamber pump is the industry standard for efficient inflation. If the kit doesn’t have one, know that a good aftermarket pump will set you back around $60. Do not fall for the ‘electric pump’ hype unless you are willing to carry a heavy battery and pay triple the price for the gadget.
Leash and Safety Gear
You absolutely need a coiled leash for flat water. This prevents the board from drifting away if you fall. A straight leash is for surf and can tangle you in a river—avoid that. Additionally, check the fin setup. Budget boards often have a plastic “click fin” that doesn’t require a screwdriver. While not as high-performance as fiberglass, these fins are durable and perfect for a beginner who forgets their tools.
Comparing Popular Beginner Price Points
It helps to understand what different prices actually buy you. Here is a realistic look at the tiers of budget inflatable SUPs to recalibrate your expectations around price and capability.
| Price Range | Ideal For | Key Features | Typical Trade-offs |
|---|---|---|---|
| Under $250 | Occasional calm water use | Single-layer PVC, basic hand pump, aluminum paddle. | Lower inflation pressure, less rigidity, heavier access. Looks like a pool toy but works. |
| $300 – $500 | The main sweet spot for beginners | 6-inch drop stitch, dual chamber pump, adjustable paddle. | Slower turning radius–wide hull style. |
| $500 – $700 | Heavier paddlers or long-term use | Lightweight single skin, fiberglass paddle, higher PSI rating. | Loss of absolute cheapest cost, but still lacking “premium” feel. |
Notice that you rarely need to surpass the $500 mark to start. In fact, many paddlers stay in the mid-range for years before they feel the need to upgrade to high-end carbon boards.
Common Mistakes New Paddlers Make
Even with a fantastic budget board, beginners often make mistakes that affect how much they enjoy the sport or how safe they are.
- Over-inflating: Always inflate to the recommended PSI, not the maximum. If the board says 12-15 PSI, start with 12 and add only if it feels soft.
- Skipping the “kneeling” phase: Do not stand up immediately when you hit the water. Start on your knees, establish balance, and then rise slowly. It prevents a lot of splashing and frustration.
- Ignoring weather forecasts: Budget boards drift easily in crosswinds. If weather conditions look stormy, opt to paddle another day—wind is the biggest beginner killer.
- Buying on “weird” brand names: If the brand name is a random string of consonants that you cannot spell, or is only found on an unreviewed marketplace, avoid it. Stick to brands with actual websites and contact details.
- Treating it like a solid board: While inflatables are durable, they scuff. Avoid dragging them on concrete rather than caring for them,
If you are fascinated by the evolution of water sports gear and how modern watercraft designs came to be, you might also enjoy reading about the fascinating history behind the Tom Blake Hollow Surfboard Invention.
Maintenance Tips to Extend the Life
A budget inflatable board will last you 5 to 10 years if you clean it properly. The most common issue is UV damage and mold. Here are three actionable steps to protect your investment.
- Rinse it after every saltwater session: Salt can corrode the fin box and rigidify the PVC. Rinse with fresh water and dry before rolling it up.
- Loosen the roll: When storing, try to fold the board loosely in a circular shape in its bag rather than tightly rolling it like a burrito—this prevents stress fractures along the crease lines.
- Check the valves at the start of each season: Wipe out around the inflation valve. Sand or grit in the valve can cause slow leaks that are hard to find.
Is an Inflatable Always the Best Choice?
While inflatables are convenient, a rigid board is the better choice if you paddle on open oceans with frequent chop or if you want to race. The hard surface provides much better “glide” (the distance you travel with each stroke) compared to inflatables which sit slightly lower in the water. However, for a beginner standing up for the first time, the slight loss of speed on an iSUP is worth the comfort of a padded deck that doesn’t hurt your knees when you inevitably start in a kneeling position. If you simply don’t have garage space or a roof rack for a hard board, the iSUP is the only practical option.
Frequently Asked Questions
What size iSUP should a beginner get?
Beginners should choose a board that is approximately 10’6″ to 11’6″ long, at least 32 inches wide, and up to 6 inches thick. This combination gives the broadest support base for learning balance while still remaining nimble enough to steer comfortably. If you weigh over 220 lbs, move to a 34-inch width if possible.
Can you use a budget iSUP on the ocean?
Yes, but only on the ocean in flat, calm conditions such as a sheltered bay. They are not designed for surf or high winds. The lack of a rigid rocker means they pound over waves instead of slicing through, so keep close to the shore and monitor tide changes.
How much PSI should I inflate my budget iSUP to?
The optimal PSI is listed on the side of the board and is usually between 12 and 15 PSI. Always use a compatible pump gauge to inflate to the lower end of that scale first (12 PSI) and then add air until the board feels stiff. In very hot weather, leave a small release allowance because air expands.
Are cheap iSUPs worth it as a trial before buying expensive?
They can be, provided the board has a 6-inch thickness and drop-stitch construction. However, avoid the very cheapest “pool toy” brands that are under 6 inches thick or inflate to under 10 PSI, as they bend in the water and behave poorly. A decent budget board is a great test to see if you enjoy the sport.
What do I do if my board has a leak?
First, inflate the board fully and listen for a hiss to locate the general area. Apply a mix of soapy water to the suspect section—bubbles pinpoint the leak. Most budget boards include a repair kit with PVC patches. Clean the area, apply the adhesive and patch, and let it cure for 24 hours before re-inflating.
Conclusion
The perfect beginner board isn’t about the price tag on the box—it’s about how it handles when you step on it. By focusing stability (width), durability (drop-stitch material), and bundle quality (the paddle and pump), you can find an inexpensive inflatable board that gets you out on the water safely. Skip the overpriced carbon boards and the flimsy $150 pool knockoffs. Find a solid, 6-inch thick, around 10’6″ board from a reputable budget brand, and you will spend the summer falling in love with paddling—without breaking the bank.