

Nail guns are indispensable tools for professionals and DIY enthusiasts alike, offering speed, precision, and efficiency for tasks ranging from framing to finishing. However, one critical factor determines their performance: air pressure, measured in PSI (pounds per square inch). Setting the correct PSI ensures nails drive smoothly, sit flush, and hold securely without damaging materials. This comprehensive guide explores nail gun air pressure, recommended PSI settings for various jobs, and tips for safety and optimization. Whether you’re a carpenter, contractor, or hobbyist, this article will help you master PSI settings for every project.
Understanding Nail Gun Air Pressure and PSI
What Is PSI in Nail Guns?
PSI stands for pounds per square inch, a unit of pressure that dictates how forcefully a nail gun drives nails into materials. Nail guns rely on compressed air from an air compressor to operate, and the PSI setting controls the power behind each shot. Too low, and nails won’t penetrate fully; too high, and you risk splitting wood or damaging delicate surfaces.
Why Air Pressure Matters
Correct PSI settings ensure:
- Proper Nail Depth: Nails sit flush or slightly below the surface.
- Material Safety: Prevents cracking, splitting, or marring.
- Tool Longevity: Reduces wear on the nail gun.
- Efficiency: Minimizes jams and misfires.
Most nail guns operate within a PSI range specified by the manufacturer, typically between 70 and 120 PSI. Always check your tool’s manual for the recommended range, as exceeding it can void warranties or cause damage.
Factors Influencing PSI Settings
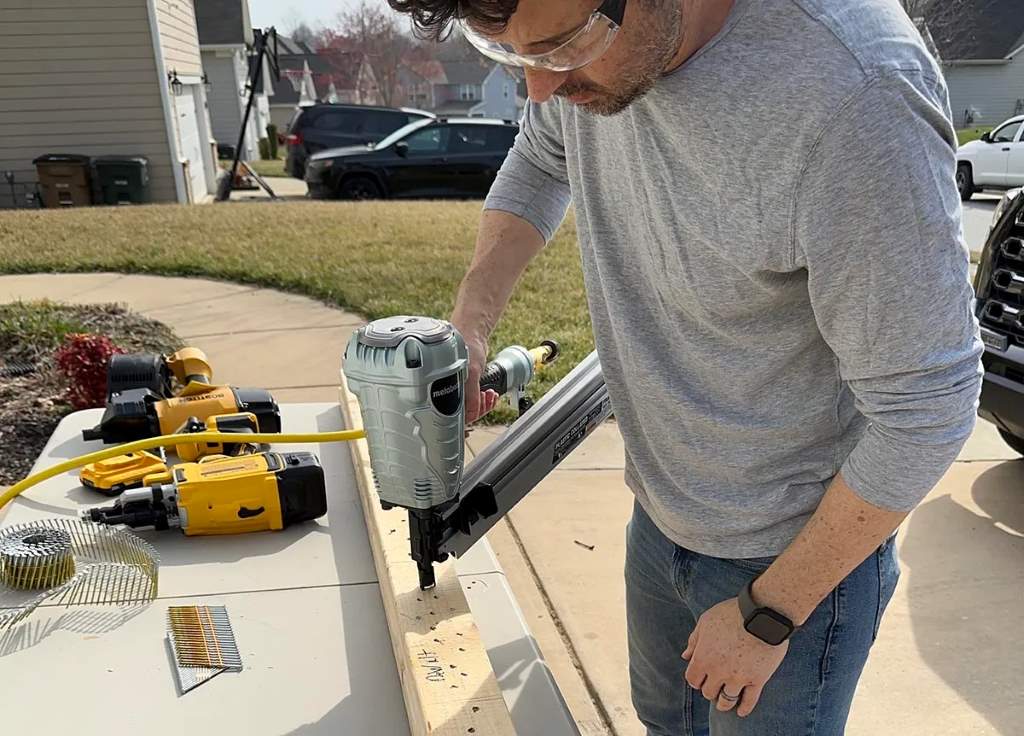
Before diving into specific settings, consider these variables:
- Nail Size: Longer, thicker nails (e.g., 3-inch framing nails) require higher PSI than smaller ones (e.g., 1-inch brad nails).
- Material Density: Hardwoods like oak or maple need more pressure than softwoods like pine.
- Project Type: Framing, trim work, and roofing have distinct needs.
- Compressor Capacity: Ensure your air compressor can deliver consistent pressure within the nail gun’s range.
- Hose Length and Fittings: Longer hoses or leaky fittings can reduce effective pressure.
You may explore: Door Frame Height
Recommended PSI Settings for Common Nail Gun Jobs
Below are tailored PSI settings for various nail gun types and applications. Adjust based on your tool’s manual, material, and nail size, and always test on scrap material first.
1. Framing Nailers
- Purpose: Building walls, roofs, and floors; securing heavy lumber.
- Nail Size: 2 to 3.5 inches, 10- to 16-gauge.
- Material: Softwoods (pine, cedar) and hardwoods (oak, plywood).
- PSI Range: 90–120 PSI.
- Settings:
- Softwood: 90–100 PSI for 2-inch nails; 100–110 PSI for 3-inch nails.
- Hardwood: 100–115 PSI for 2-inch nails; 110–120 PSI for 3-inch nails.
- Tips: Increase PSI slightly for thicker lumber or dense hardwoods. Ensure nails sink flush to avoid structural weakness.
2. Finish Nailers
- Purpose: Installing trim, molding, and baseboards.
- Nail Size: 1 to 2.5 inches, 15- to 16-gauge.
- Material: Softwoods, MDF, and light hardwoods.
- PSI Range: 70–100 PSI.
- Settings:
- Softwood/MDF: 70–85 PSI for 1-inch nails; 80–90 PSI for 2-inch nails.
- Hardwood: 85–100 PSI for 1.5- to 2.5-inch nails.
- Tips: Aim for a flush or slightly countersunk finish. Too much pressure can split delicate trim.
3. Brad Nailers
- Purpose: Light trim, crafting, and delicate woodworking.
- Nail Size: 5/8 to 2 inches, 18-gauge.
- Material: Thin wood, veneers, and softwoods.
- PSI Range: 60–90 PSI.
- Settings:
- Softwood: 60–75 PSI for 5/8- to 1-inch brads.
- Thin Hardwood: 75–90 PSI for 1- to 2-inch brads.
- Tips: Start low to avoid over-penetration. Use minimal pressure for fragile materials.
4. Roofing Nailers
- Purpose: Attaching shingles, felt, and roofing materials.
- Nail Size: 3/4 to 1.75 inches, 10- to 11-gauge.
- Material: Asphalt shingles, plywood, and composite roofing.
- PSI Range: 90–110 PSI.
- Settings:
- Shingles on Plywood: 90–100 PSI.
- Thicker Composites: 100–110 PSI.
- Tips: Adjust for shingle thickness and weather conditions—wet materials may need slightly higher PSI.
5. Pin Nailers
- Purpose: Fine woodworking, cabinetry, and attaching thin trim.
- Nail Size: 1/2 to 1 inch, 23-gauge.
- Material: Delicate wood, veneers, and lightweight panels.
- PSI Range: 60–80 PSI.
- Settings:
- Softwood/Veneer: 60–70 PSI.
- Light Hardwood: 70–80 PSI.
- Tips: Test frequently—pin nailers leave minimal marks but can split thin pieces if pressure is too high.
How to Set and Adjust Nail Gun PSI
- Check the Manual: Find your nail gun’s recommended PSI range.
- Inspect the Compressor: Ensure it’s rated to deliver the required pressure (CFM and PSI capacity).
- Start Low: Set the compressor 10–15 PSI below the target, then increase gradually.
- Test on Scrap: Fire a few nails into a sample of your material. Adjust until the nail sits flush.
- Monitor Consistency: Check for pressure drops during extended use, especially with long hoses.
- Fine-Tune: Increase by 5 PSI increments for deeper penetration, decrease for surface protection.
Safety Tips for Nail Gun Use
- Wear PPE: Safety glasses, gloves, and ear protection are essential.
- Disconnect Air: Turn off the compressor and release pressure when adjusting or clearing jams.
- Avoid Over-Pressurizing: Excess PSI can cause misfires or tool damage.
- Secure Workpieces: Clamp or hold materials firmly to prevent movement.
- Store Properly: Keep the nail gun and compressor in a dry, clean environment.
Choosing the Right Air Compressor
Your compressor must match your nail gun’s needs:
- CFM (Cubic Feet per Minute): Measures air volume. Framing nailers need 4–6 CFM, while finish or brad nailers need 2–4 CFM.
- Tank Size: 6-gallon tanks suit most jobs; larger tanks (10–20 gallons) are better for continuous framing.
- PSI Capacity: Ensure it exceeds your nail gun’s maximum (e.g., 120–150 PSI).
- Portability: Pancake or hot-dog compressors work for small jobs; stationary ones suit workshops.
Troubleshooting Common PSI Issues
- Nails Not Sinking Fully:
- Cause: PSI too low.
- Fix: Increase by 5–10 PSI and test.
- Nails Sinking Too Deep:
- Cause: PSI too high.
- Fix: Reduce by 5 PSI; check material density.
- Jams or Misfires:
- Cause: Inconsistent pressure or worn parts.
- Fix: Check hose for leaks, clean/lubricate the gun, and verify compressor output.
- Splitting Wood:
- Cause: Excessive PSI or wrong nail size.
- Fix: Lower PSI, use a smaller gauge nail.
Maintenance for Optimal Performance
- Lubricate Regularly: Use pneumatic tool oil (per manual) to reduce wear.
- Clean the Gun: Remove dust and debris after each use.
- Check Hoses and Fittings: Look for leaks or cracks that drop pressure.
- Drain the Compressor: Remove moisture from the tank daily to prevent rust.
- Store Properly: Keep tools and compressors in a cool, dry place.
Conclusion
Mastering nail gun air pressure is the key to flawless framing, trimming, roofing, and more. By understanding PSI ranges—90–120 for framing, 70–100 for finish work, 60–90 for brads, and so on—you can tackle any job with confidence. Pair the right PSI with proper safety, testing, and maintenance, and your nail gun will deliver professional results every time. Grab your tool, check your compressor, and start nailing like a pro!


