Hey there, fellow adventurer! If you’ve ever found yourself in a situation where you need to tame a wild and unruly rope, you’re in the right place. Whether you’re camping, climbing, hiking, or just trying to keep your garage organized, knowing how to daisy chain a rope is a skill that can come in handy. It’s like the art of tidying up for ropes, and it’s surprisingly simple to learn. So, let’s dive right in and unravel the mysteries of daisy chaining ropes.
What is Daisy Chaining?
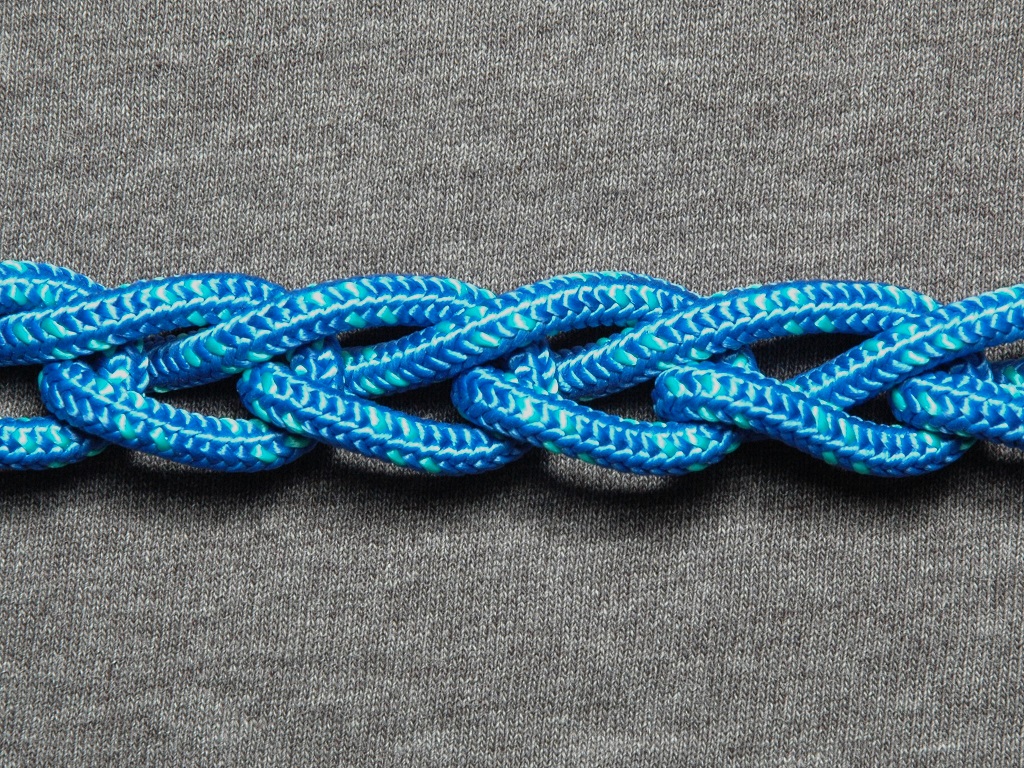
Before we jump into the step-by-step guide, let’s briefly discuss what daisy chaining is. Daisy chaining is a technique used to neatly and compactly store a rope, preventing it from becoming a tangled mess. Think of it as folding a long string into a neat bundle, much like you’d coil up a garden hose.
Now, let’s get started with the step-by-step process of daisy chaining your rope.
Step 1: Lay Your Rope Flat
Let’s start by taming your rope, as if it were a wild serpent. Find a clean and flat surface to work on, and lay the rope out flat in front of you. Make sure it’s free from knots and tangles, and take a moment to straighten it out if it’s a bit twisted or knotted. This will make the daisy chaining process much easier. To discover the quickest way of climbing rope buying guide, check out our resources.
Step 2: Create an Initial Loop
Now, let’s begin the magic! Pick up one end of the rope and create a small loop. Hold it in your hand so that the loop is facing you. The size of this loop will determine the size of the loops in your daisy chain, so make it as big or small as you like. This loop is like the foundation of your daisy chain, so take a moment to ensure it’s secure. Discover How to Untangle a Necklace?
Step 3: Wrap the Rope Around the Loop
With the initial loop in place, take the rest of the rope in your other hand and start wrapping it around the loop. Imagine you’re coiling the rope around the loop like you would if you were coiling a garden hose or a wire. Keep the wraps tight and close together to ensure a neat daisy chain.
Step 4: Continue Wrapping
Keep on wrapping the rope around the initial loop until you have only a small tail left. The number of wraps you make will depend on the length of your rope and how big you want your loops to be. For shorter ropes, you can make more wraps, while longer ropes may require fewer wraps to keep the daisy chain manageable.
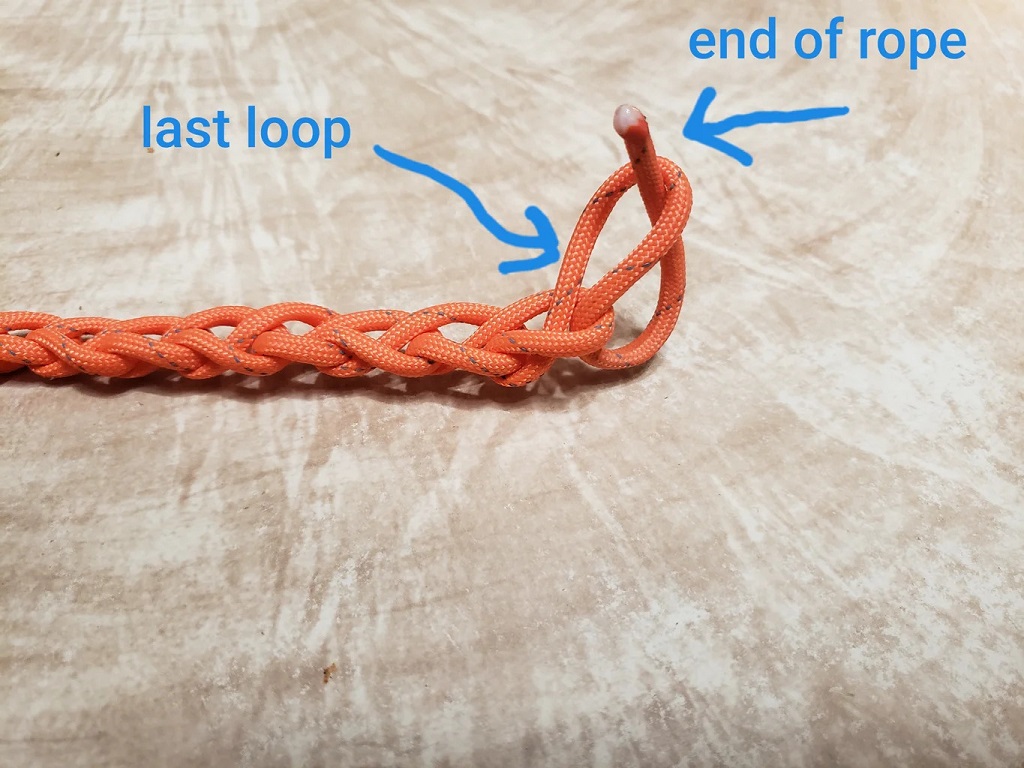
Step 5: Secure the Tail
Once you have just a small tail of rope left, tuck it through the center of the last loop you created. This will secure the daisy chain and prevent it from unraveling. Make sure the tail is tucked in snugly to keep everything in place.
Step 6: Adjust and Neaten
Now that you’ve created your daisy chain, take a moment to adjust and neaten it up. Make sure all the loops are roughly the same size, and if any of them are too big or too small, adjust them accordingly. The goal is to have a tidy and compact bundle of rope.
Step 7: Admire Your Work
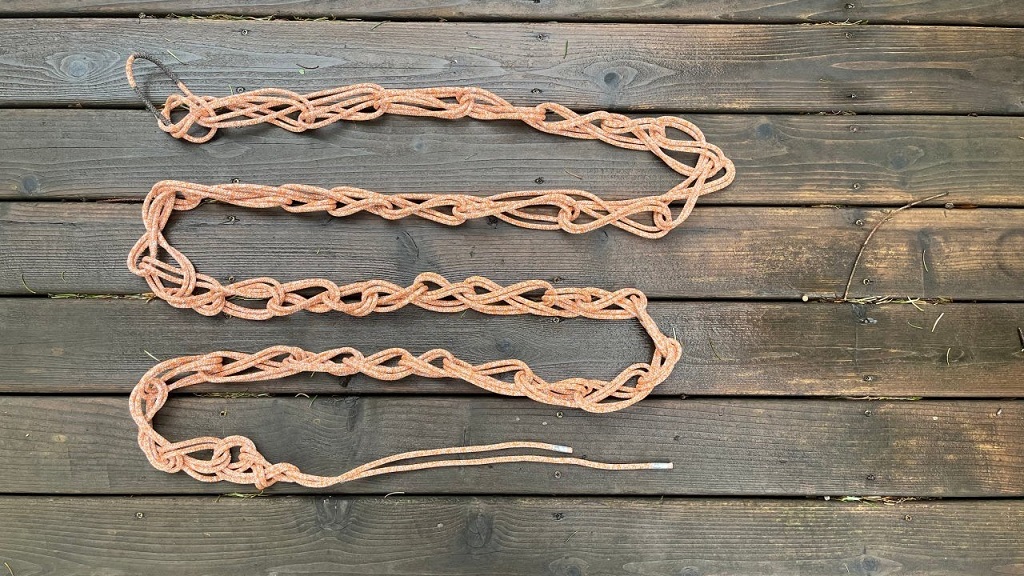
Congratulations, you’ve successfully daisy chained your rope! Take a step back and admire your neatly coiled creation. Not only does it look impressive, but it’s also incredibly practical for storage and transportation.
Now that you’ve got the basics down, let’s address some common questions that might pop up as you perfect your daisy chaining skills.
Conclusion
And there you have it! You’re now a certified daisy chaining expert. This skill is not only handy for keeping your ropes organized but also for ensuring they stay in good condition. So whether you’re preparing for your next camping trip, organizing gear in your garage, or just wanting to impress your outdoor-loving friends, you’re all set to tackle the art of daisy chaining ropes. Happy adventuring!
FAQs
- Can I daisy chain any type of rope?
Yes, you can daisy chain most types of ropes, including nylon, polyester, and natural fibers like hemp and sisal. However, it’s important to note that ropes with a very thick diameter might be a bit more challenging to daisy chain neatly.
- How do I prevent my daisy chain from unraveling?
To prevent your daisy chain from unraveling, make sure to tuck the tail end of the rope securely through the last loop you created. This will keep everything in place. You can also tie a simple overhand knot with the tail for added security.
- Are there any tricks for daisy chaining a very long rope?
If you’re dealing with an exceptionally long rope, it can be helpful to have a friend assist you. One person can create the initial loop and hold it in place while the other person wraps the rope around the loop. This can make the process more manageable for lengthy ropes.
- Can I daisy chain a wet or dirty rope?
While it’s possible to daisy chain a wet or dirty rope, it’s generally better to clean and dry the rope first. Wet or dirty ropes can become stiff and difficult to work with, and they may not daisy chain as neatly. Clean and dry ropes are more pliable and easier to manage.
- Is there a limit to the length of rope I can daisy chain?
There isn’t a strict limit to the length of rope you can daisy chain, but practicality comes into play. Extremely long ropes may become unwieldy when daisy chained, making them difficult to transport or use. For very long ropes, consider dividing them into smaller, more manageable daisy chains.