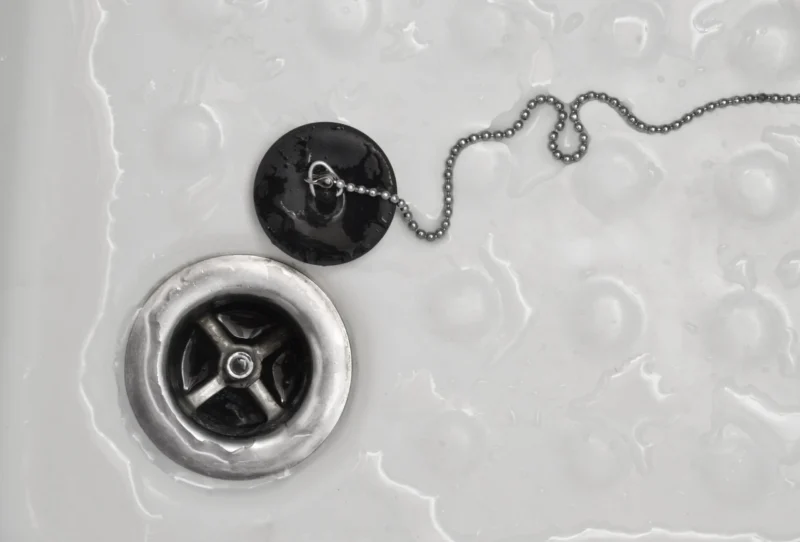
Removing a bathtub drain can be a challenging task if you don’t have the right tools or know-how. However, with some guidance, you can easily tackle this project independently without calling a professional plumber. First, you’ll need to gather the necessary tools, such as a drain key, pliers, and a putty knife.
Then, you’ll want to remove the stopper and unscrew the drain cover. Once the cover is removed, you can use the drain key to extract the drain body from the drain shoe. If the drain is stubborn, you may need pliers or a wrench to loosen it. Clean the area around the drain thoroughly, removing debris or old putty. Finally, you can install a new drain or replace the old one before reassembling the drain components. With these steps, you’ll have a clean and functional bathtub drain quickly!
Why You May Need to Remove Your Bathtub Drain
There are a few common reasons you may need to remove your bathtub drain:
- Clogged Drain: If you have a clogged drain that can’t be cleared with drain cleaners, you may need to obliterate the drain to clear out built-up hair, soap scum, and other debris. Taking the drain out gives you full access to the drain pipe.
- Replacing the Drain Mechanism: Over time, the inner workings of the drain may become worn out or corroded. Replacing the entire drain allows you to install a new mechanism for smooth, reliable performance.
- Changing the Drain Style: You may want to upgrade your existing drain to a pop-up, push-pull, or other drain style for convenience and aesthetic appeal. Changing the drain allows you to modernize your tub.
- Leak Issues: A leak from the drain area likely indicates an issue with the drain seal. Removing the drain permits you to inspect and re-seal the area properly.
- Retiling the Tub Surround: If you’re retiling your tub surround, removing the drain temporarily is advisable to prevent damaging it during the tiling process.
The process is pretty straightforward, no matter your reason for needing to remove the bathtub drain, such as a clog or a desire to replace the drain fixture. You can tackle this project with DIY plumbing know-how and save on expensive plumbing service calls. Following a few simple steps can make the task more manageable when it comes to bathtub drain removal.
Gather the Right Tools
Removing a tub drain doesn’t require a massive arsenal of specialty tools. Here are the essential tools you’ll need:
- Adjustable Wrench or Channel Locks: An adjustable wrench or channel lock pliers allow you to loosen the drain nut that secures the drain assembly. Choose a wrench with a wide mouth.
- Basin Wrench: A basin wrench is specially designed to fit into the small space behind the tub. It allows you to reach up and turn the drain nut.
- Flathead Screwdriver: Use a flathead screwdriver to pry off the drain cover plate.
- Plumber’s Putty: You’ll need a fresh plumber’s putty to create a new seal when you re-install the drain.
- Cloth Rags: Have some clean cloths on hand to catch water in the pipe when you remove the drain.
- Bucket: Place a bucket underneath the drain pipe to catch water.
- Flashlight: A flashlight is handy for peeking into the drain opening to inspect the pipe’s condition.
- Gloves: Wearing gloves will protect your hands and give you a better grip when removing drain components.
Double-check that you have all the tools you’ll need before starting. This will allow you to remove the drain smoothly from start to finish.
Shut Off the Water Supply
Before tackling the drain removal, shutting off the water supply to the bathtub is crucial. This prevents water from gushing out of the open pipe when you take the drain out.
Here’s how to shut off the tub’s water supply:
- Locate the shut-off valves for the hot and cold water lines. They are typically under the tub or nearby.
- Turn the hot and cold knobs clockwise until they stop. This cuts off the water.
- Turn on the tub faucet to release pressure and drain any standing water.
- Leave the faucet on while removing the drain. This allows any residual water to drain out.
- Check for leaks from the valves to ensure they are fully closed.
With the water shut off, you can safely remove the drain without making a mess.
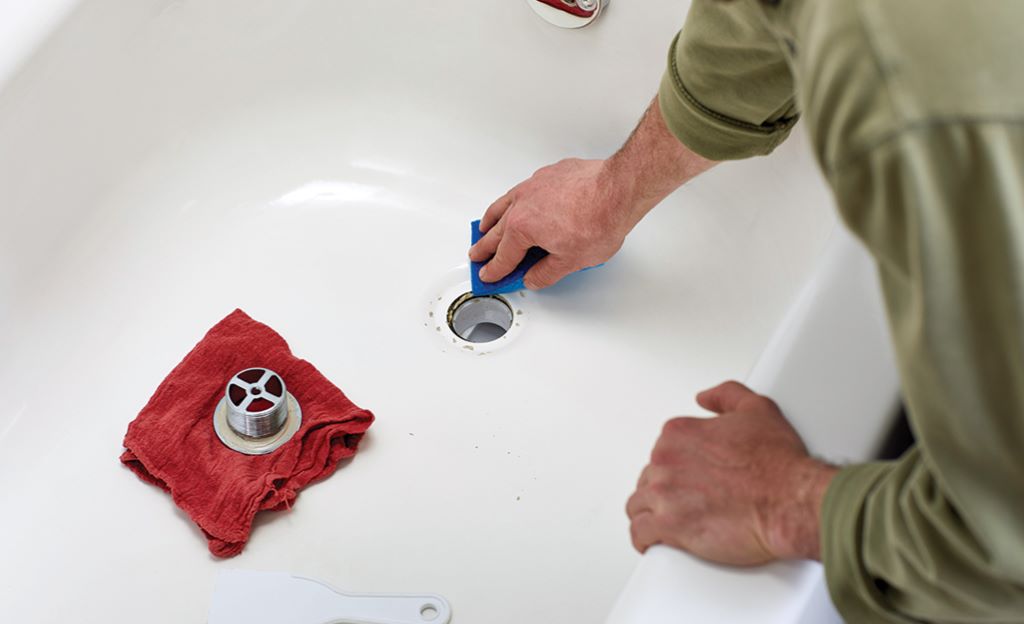
Remove the Drain Cover and Shoe
Before you can access the drain nut and remove the drain assembly, you first need to pry off the drain cover plate and remove the shoe piece:
- Place a rag around the exposed drain pipe to prevent scratching the tub.
- Insert a flathead screwdriver under one edge of the drain cover plate.
- Gently pry upward to pop off the cover plate. Set it aside.
- Next, unscrew the drain shoe counterclockwise. It may be pretty tight.
- Use an adjustable wrench or channel locks to grip and turn the shoe if needed.
- Pull the shoe up and off the assembly. Set it aside with the cover plate.
You can now see the drain nut holding the entire assembly with the cover and shoe detached.
Loosen and Remove the Drain Nut
The drain nut secures the drain body to the underside of the tub. Removing this nut is the crucial step to getting the drain out. Here’s how:
- Take your basin wrench and slide the head up through the drain opening.
- Fit the wrench head around the drain nut. You won’t be able to see the nut, so go by feel.
- Turn the wrench counterclockwise to loosen and unthread the nut.
If you’re having trouble reaching the nut with the basin wrench:
- Try using an extendable ratchet wrench instead. Collapse it to fit up through the opening, then expand it to grip the nut.
- For plastic nuts, carefully grip them with channel locks and turn them counterclockwise. Protect the tub surface with a rag.
- Apply penetrating oil and let it sit if the nut is stuck on tightly, then try again.
Keep turning the nut counterclockwise until it is completely free.
Remove the Drain Body and Tailpiece
With the drain nut detached, you’re ready to pull out the drain assembly:
- Make sure your bucket is positioned under the pipe to catch water.
- Wiggle the drain body back and forth while pulling down firmly. It should slide accessible from the drain opening.
- As you remove the drain body, water will likely spill out, so be prepared!
- If it’s stuck, gently rock it to break the seal and try again. Please don’t force it.
- Pull the entire drain assembly out and immediately place a rag in the pipe opening to block the water flow.
- Now, you can inspect the drain body and tailpiece for any blockages or damage.
- Clean any hair, gunk, or corrosion with a wire scrub brush.
- Check the tailpiece and ensure the end that fits into the pipe isn’t cracked or eroded.
With the drain removed, you now have full access to clean the drain pipe thoroughly.
Clean Out the Drain Pipe
Before installing a new drain, it’s wise to take the opportunity to clean out the drain pipe:
- Grab your flashlight and peer into the opening to inspect the pipe condition.
- Use a wire bottle brush and a long, flexible drain auger to scrub the pipe.
- Look for any cracks or leaks in the pipe and signs of corrosion.
- Work the drill up and down to dislodge any built-up gunk.
- Flush the pipe with hot water to wash debris down the line.
- Remove the rag from the opening once it’s clear.
Thoroughly cleaning the pipe while you have the drain out lets you ensure any drainage problems aren’t lingering. A clogged pipe can lead to future slow draining even with a new drain installed.
Make Any Necessary Repairs
While you have access, inspect the area surrounding the drain hole for any issues:
- Check for cracks or damage around the hole. Enlarge any small cracks with a file to prevent them from spreading.
- Look for rotted areas in the tub surface near the drain. Cut out any soft, rotted sections entirely.
- Apply epoxy putty to seal minor cracks or fill small holes.
- Cut out the section and patch it with fiberglass mesh and resin for larger damaged areas.
Doing repairs now is much easier than tearing out the drain again later!
Re-install the Drain Assembly
Once you’ve cleaned the pipe thoroughly, you’re ready to install the new or cleaned drain assembly:
- If re-using the existing drain, apply the plumber’s putty around the flanged part that fits into the tub. This creates a watertight seal.
- For a new drain, apply putty to the underside of the drain flange instead.
- Insert the tailpiece up through the pipe and into the drain body opening. Ensure it is fully seated.
- Align the drain body with the tub opening and press it into place, embedding it in the putty. Tighten the flange bolts if applicable.
- From under the tub, slide the rubber washer and then the fiber washer onto the tailpiece.
- Thread the drain nut back onto the tailpiece and tighten clockwise by hand until snug.
- Finally, tighten the nut fully with your basin wrench or tongs.
Test for Leaks
Before sealing up the drain, it’s crucial to test for leaks:
- Turn the water supply back on at the shut-off valves.
- Plug the drain and fill the tub partway with water to submerge the drain.
- Look all around the drain area for any drips or moisture.
- Tighten the drain nut further if you notice water leaking out. This compresses the rubber washer seal.
- Drain the tub entirely and fill it again to verify the leak is fixed when retightened.
- Repeat the fill and drain process until no more water leaks are present.
Doing a leak check now prevents finding out about leaks only after finishing the job. Take your time and ensure no water sneaks by the drain seal.
Replace the Drain Shoe and Cover
Once you’ve confirmed no leaks, finish reassembling the drain hardware:
- Apply a thin ring of plumber’s putty around the bottom of the drain shoe piece.
- Thread the shoe piece back onto the assembly by turning it clockwise. Hand tighten until snug.
- Clean off any old putty or grime from the cover plate.
- Press the cover plate back into place over the opening.
Finally, clean up any putty or plumber’s grease from the tub surface with a rag and mineral spirits.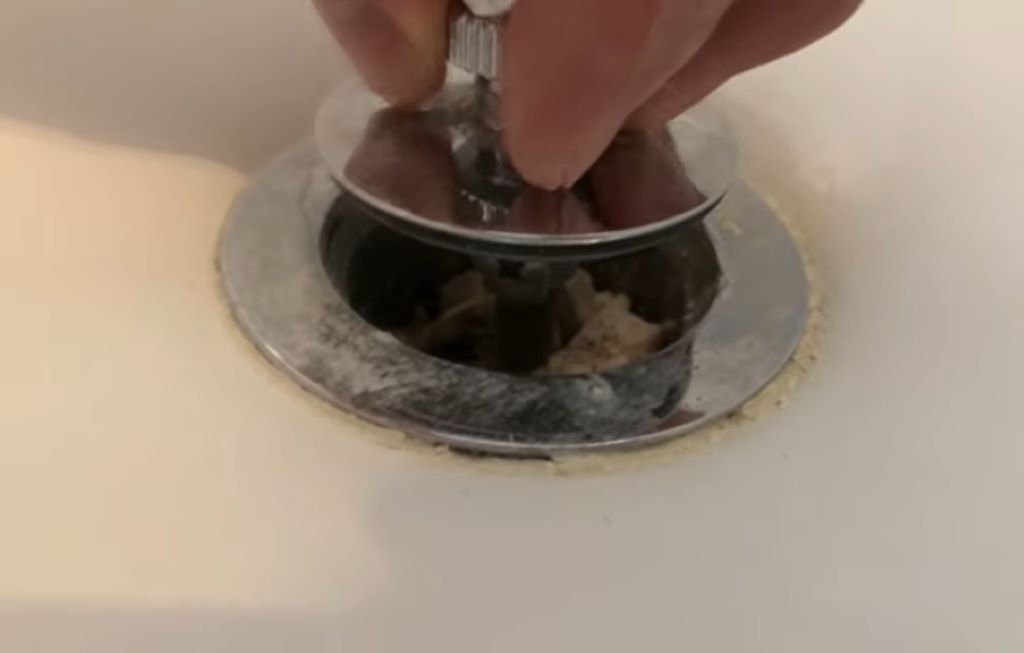
Tips for Smooth Drain Removal and Installation
Here are some additional pointers to help your bathtub drain removal and replacement go as smoothly as possible:
- Turn off the water supply at the main shut-off valve for the entire house if you don’t have individual tub valves.
- Wrap a small trash bag around the drain temporarily while you work to prevent losing parts down the pipe.
- Place a towel in the tub basin to protect the surface from tools and parts.
- For stubborn drain nuts, apply penetrating oil an hour before removing to help loosen the threads.
- Consider replacing the tub shoe and cover plate with a new chrome set for a fresh look.
- When tightening the drain nut, don’t over-tighten it, or you may crack the tub.
- If the drain nut is rusted, use a nut splitter tool to split it evenly in two directions.
- If replacing the drain flange, scrape off the old plumber’s putty entirely before applying the new one.
- Ensure the lift rod and backplate align for pop-up or push-pull drains.
Taking out a bathtub drain takes a little time and elbow grease. But with the right tools and techniques, it’s a DIY project any homeowner can tackle successfully. Following these steps will allow you to remove your old drain, make any needed repairs, and install a new, smooth-functioning drain assembly.
Frequently Asked Questions
What type of tools do I need to remove a bathtub drain?
You’ll need an adjustable wrench, basin wrench, flathead screwdriver, bucket, cloth rags, plumber’s putty, gloves, and a flashlight. A ratchet wrench with an extendable handle also comes in handy.
How do I reach the drain nut to loosen it?
Use a specialized basin wrench, which is made to fit up inside the drain opening. It lets you grip the drain nut and turn it counterclockwise to unthread it.
What if the drain nut is stuck on too tightly?
Apply penetrating oil and let it sit for up to an hour to loosen the nut. You can also carefully grip it with locking pliers or a nut splitter and turn it counterclockwise. The heat from a hairdryer may help expand and loosen the nut.
What does the drain tailpiece do?
The tailpiece extends down from the drain body into the drain pipe in the wall. It carries water from the drain into the pipe. Reattaching it properly seals the assembly.
How do I know if I need a new drain assembly versus just cleaning the old one?
Inspect the drain pieces for cracking, corrosion, and malfunctioning parts like faulty pop-up mechanisms. Replacing the entire assembly is the better option if the pieces are very worn.
How do I prevent leaks when re-installing the drain?
Apply the plumber’s putty beneath the drain flange to seal it. Tighten the drain nut securely with a wrench. Plug the drain and fill the tub to test for leaks before finishing the job.
Can I install a pop-up drain where there wasn’t one before?
You can install a new pop-up assembly instead of an old standard drain. The tub may need new holes drilled to accommodate the pop-up mechanism. Follow the manufacturer’s instructions.
Final Summary
Removing a bathtub drain is a multi-step process requiring DIY plumbing skills. By following the proper steps, using the right tools, and taking time, you can successfully remove your old drain for repair, cleaning, or replacement. Discover the secrets of pool maintenance! Learn how to drain a pool like a pro—test for leaks, fix tub issues, and reassemble components flawlessly. Enjoy smooth drainage for years, all in a weekend DIY project, saving you from costly plumbing service calls.